Monday, March 28, 2016

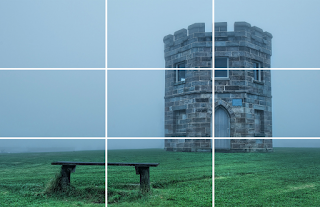
Finding Composition in Photos

Finding Composition in Photos

1) Read below about what makes strong composition in a photograph and what catches the viewer's eye.
2) Find 8 sample photos online which show one of each of the "basic guidelines" of composition and save them to your desktop.
3) Name each photo as the NAME AND NUMBER of the guideline. (For example: 8.RuleofThirds)
4) Drag and drop all 8 photos into a folder that you create on your desktop named "Composition".


Sunday, March 27, 2016

Contemporary Photojournalists: James Nachtwey

Contemporary Photojournalists: James Nachtwey


Contemporary Photojournalists: James Nachtwey,


Using the link below and other sites on the internet, answer the following questions (copy and paste questions and answer in Word) to learn more about contemporary photojournalist James Nachtwey.

CLICK HERE to view link about Nachtwey and click "BIO" at the bottom of the screen for his biography that will help you answer the questions and view his photo essays.

1. When and where was Nachtwey born?

2. Where did Nachtwey attend college and what did he study?

3. What inspired Nachtwey to become a photographer?

4. When did Nachtwey start photographing?

5. What are the three topics of Nachtwey’s photographs?

6. Name five of Nachtwey’s photojournalistic assignments?

7. Nachtwey has worked for which photographic organizations during his career?

8. Where has Nachtwey held solo exhibitions?

9. Which awards has Nachtwey received more than once?
10. How many books has Nachtwey published?

Sunday, March 20, 2016

Photoshop Advertisement

Photoshop Advertisement

Due: March 24th


Directions: Create 3 photo advertisements all for different brands. Use google images to find your high resolution images and use tools we have learned, filters, and text to turn the image into an ad. Think about creative ways of representing that brand (slogans, imagery, etc.). You may also use the internet to look at examples of photo advertisements for inspiration. Before you start working on each, answer the following questions in Microsoft Word and save them in the folder with your Photoshopped images: 
  1. Who is the client, or company you are representing?
  2. What is the product?
  3. Who is the target audience?
  4. Where would you expect to see this advertisement?


Mr. Newell's Example: 


ITC Student Example by Rocelle Ray:

Advanced Media - Senior Tribute Video: What's So Cool About Our School

 Advanced Media - "What's So Cool About Our School" Music Video

Directions: Spend two weeks (March 21st-April 1st) Working in groups of 2 or 3 making a creative music video showcasing "What's so cool about our school"at ITC. Possible ideas include: Lip Dub Video, Dance Music Video, School Spirited Videos / Photo Slideshows. The video should be about 2-5 minutes long (length of song) and all photos and video must be shot (and edited) by you. Below two examples of this from Syracuse University and Liverpool High School.

Syracuse University - "Happy Dance Music Video"


Liverpool High School - "I've Got a Feeling Lip Dub Video"


Monday, March 14, 2016

Using Text and Shapes in Photoshop

Using Text and Shapes in Photoshop


Using Text and Shapes in Photoshop
This series of projects will teach you how to use Text and Shapes on a photo.  There are four projects listed below that will help you learn how to use type on your photos in very creative ways to help make your photos convey a message in a different way.
For the first three projects you will use a blanl Photoshop document to practice the techniques. The last assignment you will add type and shapes to a photo.

Project One: Adding Type to a Photo

a.       Launch Photoshop
b.      Create a blank document: File > New
c.       Name the document with your name and the project name.
d.      Size the document: Width 10 inches, Height 8 inches, Resolution 200. Do not change any other settings at this time.
e.       Select the Type Tool from the tool bar at the left.
f.        Bring your courser onto the document, mouse click, then hold and drag to make a box.
 
       Begin typing. Locate a quote from the Internet about media and type it in the box you created. 
h.      Adjust the size, font and color at the tool bar located at the top of the Photoshop workspace.
i.         To adjust the size and shape of the box: Mouse click and hold onto a square at the corners of the box.
j.         Save onto desktop and post to your blog.

Project Two: Text on a Path

a.       Launch Photoshop
b.      Create a blank document: File > New
c.       Name the document with your name and the project name.
d.      Size the document Width 10 inches, Height 8 inches, Resolution 200. Do not change any other settings at this time.
e.       Select the Freeform Pen Tool from the tool bar at the left. 
f.        Go to the top of the Photoshop workspace and make sure Path is selected.
g.       Bring curser onto blank document, mouse click and hold and draw any path.
h.      Next, select the Type Tool (horizontal)
i.         Hover the curser over the center of the Path you just created…mouse click and begin typing. Use a different quote than the first project.
j.         Adjust size, font and color at the top of the Photoshop workspace.
k.       To modify the Type and Path, select the Direct Selection Tool.
l.         Hover the courser over the type and look for the curser to change to arrows. Mouse click and drag type to desired location along the path.
m.    When finished, click the “check mark” at the top of the Photoshop workspace.
n.      Save onto desktop and post to your blog

Project Three: Text in Shapes

a.       Launch Photoshop
b.      Create a blank document: File > New
c.       Name the document with your name and the project name.
d.      Size the document: Width 10 inches, Height 8 inches, Resolution 200. Do not change any other settings at this time.
e.       Select the Custom Shape Tool in the tool bar at the left. 
f.        Go to the top of the Photoshop workspace and select Path.
g.       Select Shape to want to use. 
h.      Bring curser into the blank document, mouse click, hold and drag to make
the shape.
i.         Select Type Tool from tool bar at left.
j.         Hover the courser over the outline of the shape and begin typing.
k.       Adjust size, font and color at the top of the Photoshop workspace.
l.         When finished, save and post to your blog.

To fill the Shape with text, follow the directions below:

a.       After you have made your shape, go to the top of the Photoshop workspace and select Shape.
b.      Select the Type Tool from the tool bar at the left.
c.       Hover your curser in the center of the shape, mouse click and begin typing.
d.      Adjust size, font and color at the top of the Photoshop workspace.

Project Four: Use these techniques in a Photo

a.       Use one or more of the “Type” and “Shape” techniques on a photo. 
b.      The photo can be one you shoot, select from your files, or the Internet.
c.       The Type and Shapes you select should enhance the meaning of the photo.
d.      Save the finished project to your desktop

Sunday, March 13, 2016

Photography - Environmental Portraits

Photography - Environmental Portraits

Overview: An environmental portrait is a portrait executed in the subject's usual environment, such as in their home or workplace, and typically illuminates the subject's life and surroundings.
 By photographing a person in their natural surroundings, it is thought that you will be able to better illuminate their character, and therefore portray the essence of their personality, rather than merely a likeness of their physical features. It is also thought that by photographing a person in their natural surroundings, the subject will be more at ease, and so be more conducive to expressing themselves, as opposed to in a studio, which can be a rather intimidating and artificial experience.

Part 1: Project Proposal (Due Friday, March 4th)

Directions: Write a proposal (3 paragraphs) articulating what we will see in your Environmental Portrait. The proposal should include:
1) Who are you taking the photo of?
2) Where are are you taking the photo?
3) What story does the relationship between the subject and background tell?

 Part 2: Portrait (Due Friday, March 18th)

Directions: Spend two weeks (Monday, March 7th - Friday, March 18th) exploring taking digital portraits of your friends and family in a location that tells a story/gives context to the photo.
DUE FRIDAY, MARCH 18th: Take at least 5 photos and choose your favorite photo to share with the class. Use photoshop to enhance your photos using levels, curves, and the healing brush tool (among other tools) to enhance your final portrait.

"The Builder"
Portrait by Jeffrey Newell

"The Patriot"
Portrait by Jeffrey Newell


TIPS: 1) Spend time getting to know your subject:
Before you select a location and start shooting, spend some time getting to know your subject. Find out where they spend their time, what the rhythm of their life is like and observing their personality. Out of this you’ll not only find appropriate locations but will begin to get a feel for the style of shots that might be appropriate and you’ll begin the process of helping your subject relax into the photo shoot. If possible it might even be helpful to accompany your subject to some possible locations to see both how they look but also how your subject behaves and interacts there.
2) Choosing a Location:
Sometimes a location chooses you (it’s easy) but on other occasions you need to be quite deliberate and purposeful in making your choice (and it can take a lot of searching). When choosing your environment you ideally want to get one that:
  • says something about your subject – after all that’s what this style of photography is all about
  • adds interest to the shot - as I’ve written in previous tutorials – every element in an image can add or detract from your shots. The environment that you place your subject in needs to provide context and be interest without overwhelming the shot


3) Props?:
Props can make or break an environmental portrait. If they are subtle and naturally fit within the context of the environment they can be very appropriate and add to the image nicely but you’ll want to avoid anything that doesn’t quite fit or that potentially distracts the attention of viewers. The same goes for the clothes that your subject wears. Try to be true to the context without getting too outlandish.
4) Posing:
What sets the environmental portrait apart from candid portraits is that you post your subject (it’s a fine line and you might end up doing a bit of both in any given shoot). Don’t be afraid to direct your subject to sit, stand or act in a certain way that fits with the environment that you’re shooting in. Some of the poses might seem slightly unnatural and dramatic but it’s often these more purposely posed shots that are more dramatic and give a sense of style to your shot.
The expression on the face of your subject is also very important in environmental photography and you should consider how it fits with the overall scene. For example if you’re shooting in a formal environment it may not be appropriate to have your subject with a big cheesy smile and you might like a more somber or serious look. Again – mix it up to see what does and doesn’t work
5) Camera Settings:
There is no right or wrong way to set your camera up for an environmental portrait as it will depend completely upon the effect you’re after and the situation you’re shooting in. You might find that shooting at a smaller aperture (larger numbers) will be appropriate as it will help keep the foreground and background in focus. I generally shoot with a wider focal length in these situations also to give the environment prominence in the shot. Of course this doesn’t mean you can’t shoot more tightly cropped or with a large aperture and shallow depth of field – ultimately anything goes and you’ll probably want to mix up your shots a little.


 Photo by Elias Williams
 Photo by Elias Williams

 
Photo by Elias Williams

ITC Video Resumes

ITC Video Resumes

Directions: We will be creating video resumes to showcase your skills, goals, and top projects in your media classes this year.


Outline:
1) List AT LEAST 5 strengths that you have in media (for example: Photoshop, Camera Operator, News Anchor, etc.)
2) List AT LEAST 5 media projects that you are proud of that you would like to include in your video resume (for example: Lasso Tool Photoshop Project, Studio Portrait, Tech Newscast, No Dialogue Video, Poster, etc.)
3) List AT LEAST 5 goals that you have for the rest of the year / future in media (for example: Master my pacing in editing, Improve my eye for shot composition, Refine my skills in newswriting, etc.) 

The following is an example of a VERY creative video resume: Video Resume Example

ITC Day at Newhouse Follow-Up

Follow-Up to ITC Day at Newhouse Field Trip


Great job by everyone during our visit to The Newhouse School.

There are three assignments Mr. Newell would like you to do as a follow-up to the visit.
  1. Write Thank you notes to the people you worked with.
  2. Answer the question from the Communications class we visited.
  3. Produce a story (with photos) about your experience at Newhouse. This will be sent to Ashley Kang to be published in The Stand newspaper and website.


1.            Write and email Thank you notes to the people you worked with.
Please write a short thank you email to each person you worked with or met yesterday during our visit to the Newhouse School.
Personalize each email with one unique experience you had with that person.

Example:

Subject Line:  Visit to The Newhouse School

Dear Dean Branham,

It was great meeting with you yesterday during our visit to the Newhouse School. I really enjoyed learning about all the programs offered at the school. I would love to study broadcast journalism at The Newhouse school.

Thank you again for the opportunity to meet with you and visit the school.

Nick Lisi

Media student at ITC


Dean Lorraine Branham - lbranham@syr.edu

Dean, Newhouse School of Communications at Syracuse University


Professor Steve Davis - jsdavi02@syr.edu
Chair, Newspaper & Online Journalism

Professor Chris Tuohey - cptuohey@syr.edu

Chair, Broadcast & Digital Journalism


Professor Greg Heisler - studio@gregoryheisler.com

Distinguished Professor of Photography

Professor Professor Charisse L’Pree – clcorsbi@syr.edu

Professor of Communications and Media Studies
 
Ashley Kang - ashley@mysouthsidestand.com

Director of The Stand newspaper


Steve Infanti - sjinfant@syr.edu

Sports Director, News Channel 9


2.            Answer the question from the Communications class we visited.

As a follow-up to attending Professor Charisse L’Pree’s  COM 346 (Diversity and Media) class, answer the question below.

Define what a threat to masculinity is and provide an example.


3.            Produce a story (with photos) about your experience at Newhouse. This will be sent to Ashley Kang to be published in The Stand newspaper and website.
Students can work in teams or alone and answer the questions listed below about their experience visiting The Newhouse school.
It can be done as a video, written story with photos.
  • What kind of impression did the tour of Newhouse leave on you?
  • How are the programs/equipment at Newhouse similar to what we have at ITC and how are they different?
  • How has this field trip inspired you for college/work in media fields?

Tuesday, March 8, 2016

Grid Photoshop Project


For this assignment you will select a “Theme” for your photos, then using your photos create a 9 Square Grid in Photoshop to display them.
Directions:

First select the “Theme” for your photos. Your theme should be a collection of 9 photos that are related in some way. They could be location, color, leading lines, or pattern. The nine photos you use in your project must have some commonality.

Using Photoshop, crop each photo 3 inches X 3 inches @ 300 dpi.

Once photos are cropped, create the document for your grid.

In Photoshop click on File > New.

Name your document. Then size the document.

Width: 9 inches
Height: 9 inches
Resolution: 300 inches/pixels

Click OK.

Turn on the rulers function. Click View > Rulers

You now will be working in Layers. Bring each of the 9 photos into the document and arrange in grid making sure each photo is the same size and shape.

Look at the ruler along the edges of your document to be sure you're sizing the photos to the correct dimensions.

When you’re finished, flatter layers and save as a .jpeg. Be sure to name your file with your name so I know its your project.